SteamPunk Rifle
(and my very first blog to boot!)
So I thought this might be easier, and possibly more satisfying than simply trying to chronicle my creative endeavors on Facebook. At least this way I can not only show my work in progress, but also discuss the details of techniques, and materials, because that is often a conversation that arises on the book when posting pictures of this sort. The first few of these blogs are probably going to be pretty rough in nature, I am still fighting the urge to simply do this in MS Word, and that urge might win out in the end. Before I get into the nitty gritty of the project I'm gonna detail the build up to it.
So this whole steampunk thing started with dad and his Steampunk Nerf guns. As an adult I've realized that dad is as much a nerd about stuff as I am, he is just better able at concealing it. Well I too have a creative nerd in me (apparently its an inherited trait) and decided to try my hand at it. And yes, Kim knows it, there is a competitive streak between my brother and myself, and that kind of thing isn't sated easily. Anyway dad is pretty stinkin decent at this stuff, especially when it comes to the application of paint. I've never considered myself crafty, more of an idea man than a creator. Any readers will probably remember my
Lightsabers:


my Shishkebob sword and Armor for a fallout airsoft game:

and of course my most recent, the "Gentleman" Maverick steampunk gun:
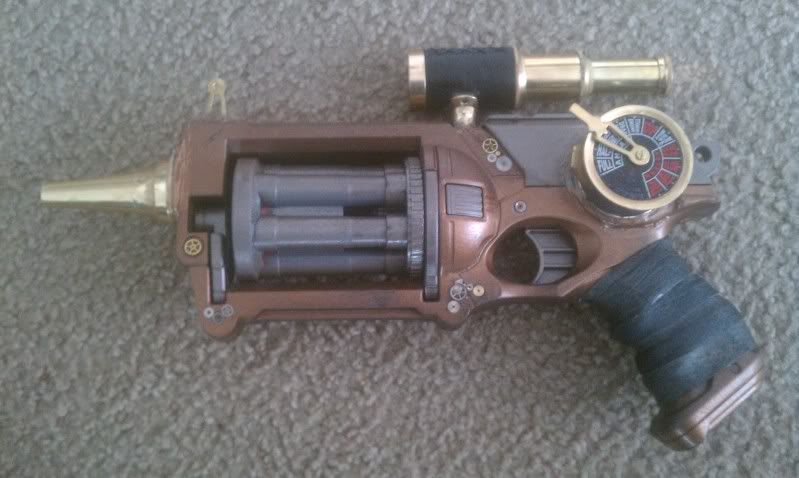
Some of those required more fabrication than others, but a lot of it was simply the re-purposing of different parts or materials.
And that brings me to the current project. While this project will be re-purposing parts, it is primarily a project of fabrication and creativity, building something that I couldn't just see from mentally altering an existing...thing. It also keeps a certain sibling from griping about the origins of some of the materials used... I am a slave to historical accuracy, except when I'm not, so I have included a *gasp* sketch of my initial idea.

First you will note that my drawing ability is akin to that of my five year old, possibly inferior to it. But the picture might also give you a general idea of what it is I am hoping to accomplish. It took a while acquiring the basic parts I needed. The goal was to spend as little money as possible, no point in breaking the bank for a silly prop. But eventually I got it all more or less together.There are still pieces but whats present will make up the bulk of the end product.

The first step for no reason (other than wanting to play with my new butane torch probably) was forming the copper tubing into a coolant spool...thing. I started with a typical coil of 1/4" ID Copper tubing from home depot, about $8. It was already in a rounded spool shape so by hand I simply twisted it until it got into rings about 1" larger than what I needed. The big fear was that while bending the tube it would crimp. The trick to bending copper is heat and sand. Fill the tube with sand, any sort will do, and then heat the pipe. The sand prevents crimping while the heat makes the metal malleable. I didn't use sand and just used heat to gently continue the bending process. Eventually I got this:


The tubing still needs a bit more work so that the ends have a bend that will get them in contact with the copper end caps,(seen in the last picture)but over all I am very happy with the result, especially that I managed to do this on the first try with no crimping. The coil is tight enough that it stays in place on the barrel but can still be removed without trouble. Now I need to cut out the wood to attach those copper end caps seen on the right.
I have a limited supply of tools, so this actually proved to be a bit of a puzzle. I ended up starting the grooves by hand with my exacto knife and when they were relatively worked into the wood I tried to use my rotary tools cutting bit.
It didn't work.
In the end I used a drill bit in the aforementioned rotary tool and ground out the wood. It actually worked pretty well, though not exactly precise. Note to self, buy more tools.

I will need to figure out how to fill in the gaps without it looking janky. Of course that is kinda this whole project in a nutshell.
*sigh*
As far as the copper tubing goes, I still need to bend one end to meet the cap. Once both sides are finished the caps will be drilled and soldered to the tubes. But that is actually one of if not the final step since I will need to have the internals and bolt finished first.
That's all for now, updates soon, since I have acquired (about 15 minutes ago) what should hopefully become the bolt mechanism for this monstrosity.